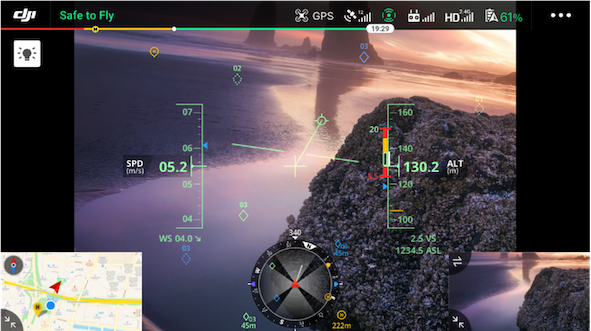
We’ve put all critical flight avionics information into a new, intuitive, informative interface. Admittedly, at first glance, there’s a lot going on in this PFD. How did we get here?
Imagine trudging up Big Kill Devil Hill with a plane you built out of wood with the intent of launching yourself into the sky to attempt sustained flight. It might seem like madness, but the Wright brothers braved immense risk to realize their dreams. Especially from the perspective of modern aviation safety standards, the first flights were absurdly dangerous.
Flyer, the aircraft the Wright brothers designed, built, and on December 17, 1903 flew for the first time, was piloted lying face-down and could be crudely controlled with a system of ropes and pulleys that manipulated the tilt of the wings and rudder.
While airborne, Orville and Wilbur could rely only on their eyes to guess airspeed and heading, altitude and attitude, and the current meteorological conditions, all of which are critical to safe flight.
The Six Pack
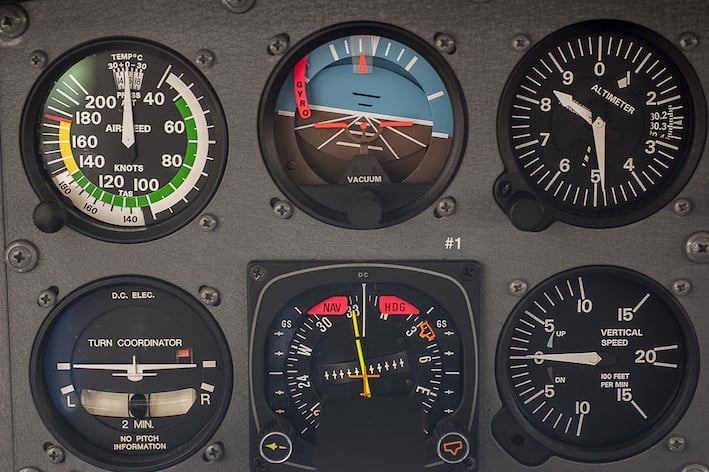
Flight and aviation have come a long way since 1903, and pilots today have access to a host of flight instruments to give them a proper grounding while in the sky. One milestone in flight situational awareness was the establishment of the Aviation Six Pack, or a standardized set of six flight instruments deemed essential for pilot awareness and aviation safety.
- Airspeed Indicator
- Attitude Indicator
- Altimeter
- Vertical Speed Indicator
- Heading Indicator
- Turn Coordinator
Developing the Primary Flight Display
In early cockpits, the six pack of flight instrument readings were displayed on the dashboard via mechanical dials and gauges. To simplify the cockpit, aviation engineers compiled the outputs of all six traditional flight instruments into one integrated, intuitive display. Modern aviation standards now provide pilots an easy-to-scan PFD that covers the six pack with indicators for airspeed, heading, altitude, attitude, and vertical speed.
Head Up and Eyes on the Ball
While airborne, it’s essential that pilots remain attentive to their surroundings. During complicated and high-intensity flying scenarios, it can be troublesome for pilots to continually divert their eyes and attention from their surroundings to scan the PFD. Ocular fatigue and the inherent danger of taking your eyes off your surroundings drove the development of the Heads-Up Display (HUD). The HUD overlays flight data on the windows of the cockpit so pilots can intake critical aeronautical information without having to frequently lower their eyes to the control panel. Today, it is standard for pilots to enjoy the benefits of both the PFD and HUD.
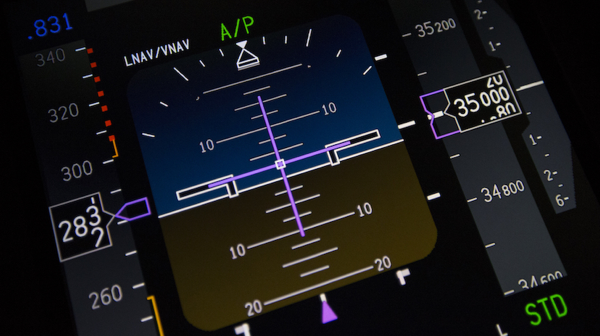 Commercial Airplane Primary Flight Display Commercial Airplane Primary Flight Display |
|
To protect the skies and keep drones, pilots, people and property safe, DJI has developed a drone Primary Flight Display designed specifically to bring mission critical flight information to the pilot in a natural and intuitive way.
A side-by-side comparison clearly shows that DJI’s PFD takes inspiration from commercial airline standards, but with an emphasis on the human element in the pilot-drone relationship. The result is a drone flight interface that cherry picks the most important and relevant features from commercial aviation PFDs and HUDs to maximize drone pilot situational awareness and streamline operation efficiency and safety.
Unpacking DJI’s PFD
A picture is worth a thousand words, and it goes without saying, to get a true sense for its depth, the PFD must be experienced in action. 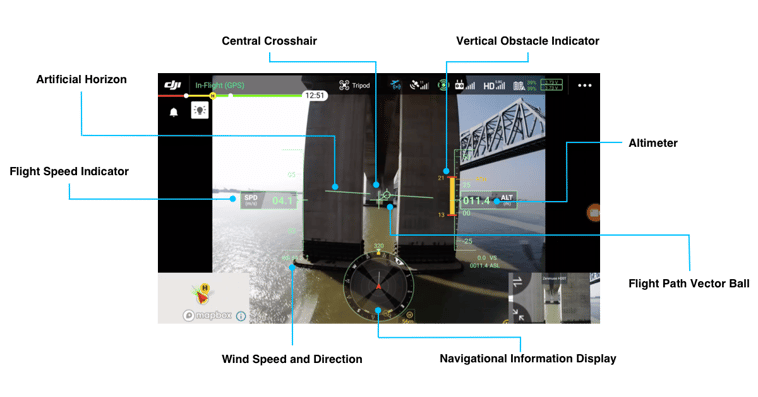
Here’s what you need to know when it comes to DJI’s new PFD.
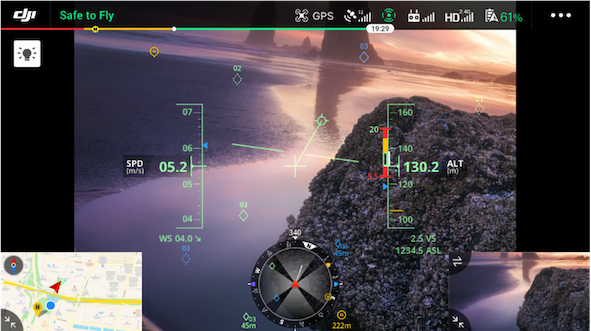
Central Crosshair: When in FPV mode, this central cross delineates the direction that the drone is facing. It is always in the center of the image.
Artificial Horizon: These two horizontal lines reflect the current attitude or tilt of your drone. When your drone is completely level, the lines displayed here will be flat.
Flight Path Vector Ball: This indicator marks the direction and speed your drone is flying. You can think of the ball and vector as an arrow that points the direction your drone is flying. If the vector ball is above the Artificial Horizon, your drone is ascending, and conversely, if the vector ball is below, descending. A longer vector signals a sharper angle of ascent or descent.
Flight Speed Indicator: This indicator on the left shows your current ground speed, the current wind speed, and the wind direction relative to your aircraft.
Wind Speed and Direction: Below the Flight Speed Indicator you can read the current wind speed and direction, as detected by the Matrice 300 RTK.
Altimeter: This meter shows your altitude relative to your take-off point. Below you can see your Vertical Speed and your altitude above sea level.
Vertical Obstacle Indicator: The bar to the right of your crosshair displays the distance to obstacles above or below your drone. When obstacles within 30m appear above or below your drone, the vertical obstacle bar will alert you, display the distance between your drone and the obstacle, and shorten as the distance shortens.
Navigation Information Display: Directly below the center crosshair, you’ll find a compass that displays horizontal obstacle information. The red navigation icon indicates your current heading, and this arrow is fixed upwards. Above the compass is an indication of the degree of separation between your drone’s heading and North. Horizontal obstacles are displayed in compass, and grow larger as you fly closer.
A vector drawn from your red navigation icon indicates the horizontal direction you are flying. This vector lengthens to reflect current ground speed. When hovering in place, the vector will disappear.
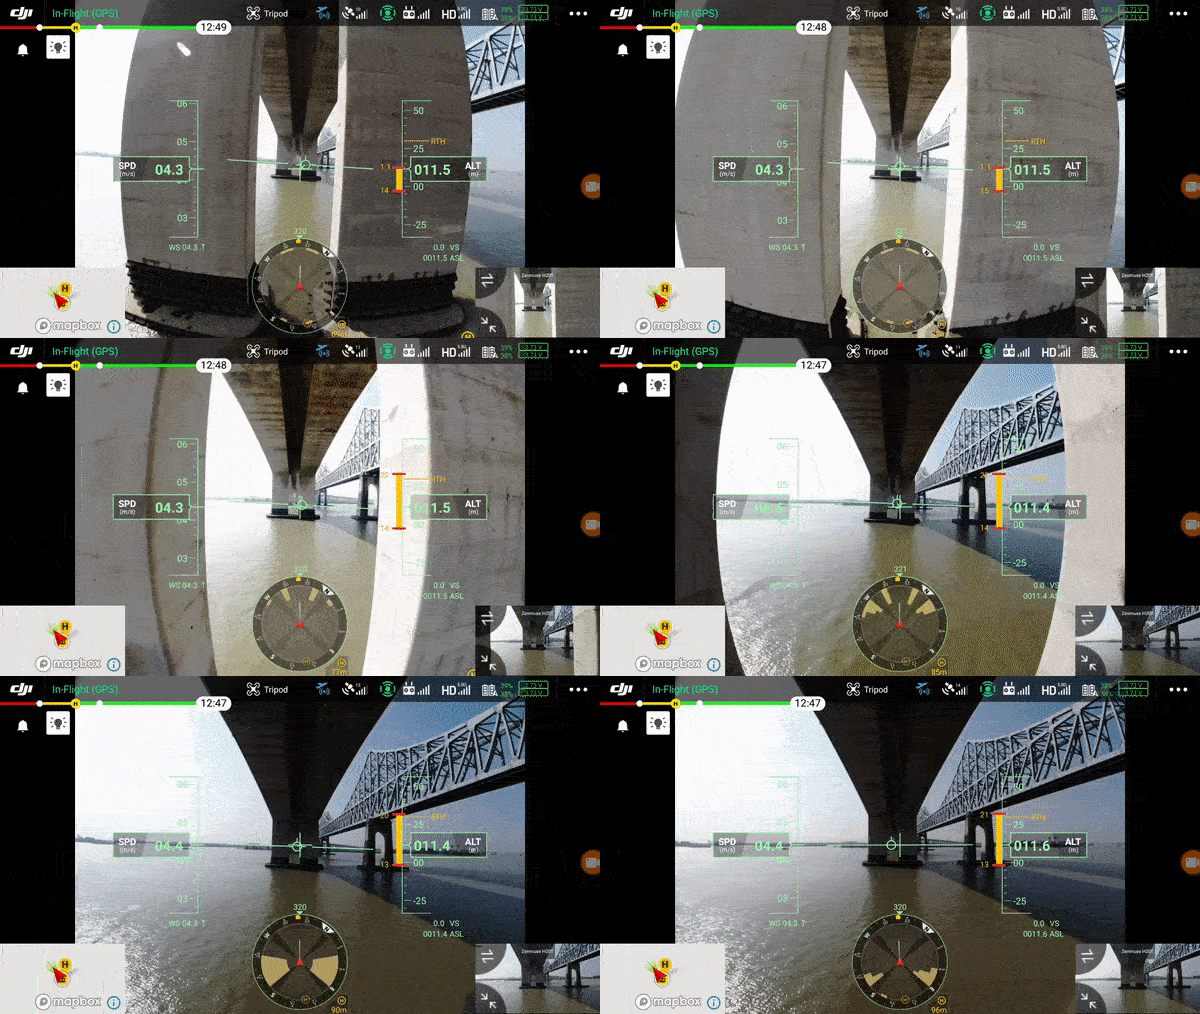
The Primary Flight Display in action as the Matrice 300 RTK flies near obstacles
Thank you for reading
With the DJI Primary Flight Display, we’ve created a whole new way for pilots to interact with their drones. This enhanced flight interface increases pilot situational awareness and airspace safety.
To learn more about the Matrice 300 RTK, click through on the image below.


.png?width=300&name=L3kv%20(1).png)

.png?width=300&name=FH2%20update%20(1).png)
-1.png?width=300&name=HS%20-%20Featured%20Images%20(3)-1.png)